
Installation - Paint Protection Film for Tesla Model Y
🚨 WARNING (risk ofpersonal injury if not observed)
- If the cleaning solution used during installation (diluted dish soap) gets into your eyes, rinse immediately with water and consult a doctor if irritation persists.
- Keep out of reach of infants and small children during storage and installation.
⚠️ CAUTION (risk of damageto the product or vehicle if not observed)
- If the installation area has scratches or dents in the body, air bubbles in that area cannot be fully removed. Please be aware of this in advance.
- Wash the vehicle and remove dirt from the installation area beforehand.
- Avoid installing in direct sunlight, or in temperatures above 30°C (86°F) or below 10°C (50°F). The film's adhesive may not perform properly outside this range.
- Installing this product may affect your vehicle's new-vehicle warranty or paint warranty. Please confirm the warranty terms with an authorized dealer or retailer before installation.
Preparation
- Add 0.5–1 drop of dish soap to the included spray bottle, fill it with tap water to the top, and shake well to mix. Note: Using too much dish soap will cause excess foaming, making it harder to adjust the film's position.
- A microfiber towel is recommended - it makes wiping easier after installation.
- We recommend installing indoors, in a low-wind environment, at a temperature of roughly 15-30°C (59-86°F). If installing outdoors, avoid direct sunlight and watch for
dust. - Installation takes approximately 10–20 minutes per panel. Please allow yourself enough time.
- We recommend working with two people - one to hold the film in place and one to apply it.
What's Included
- Protection Film — Right Door ×1
- Protection Film — Left Door ×1
- Squeegee ×1
- Spray Bottle ×1
- Microfiber Towel ×1
Installation
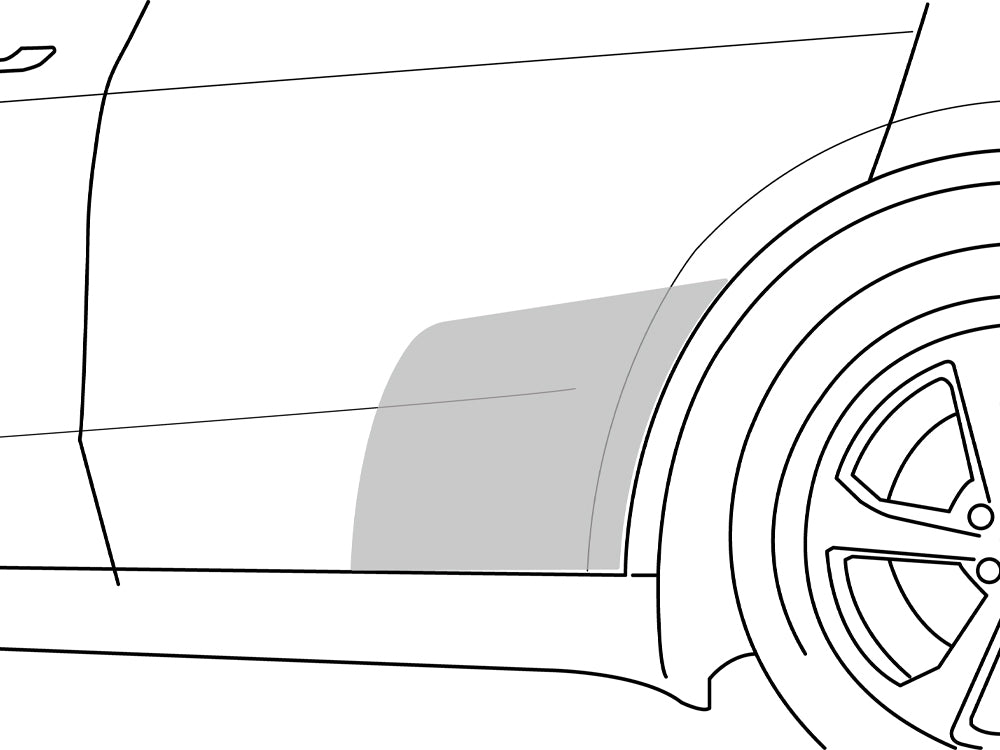
1. Check the installation position in Figure 1 (this example shows the left rear door).
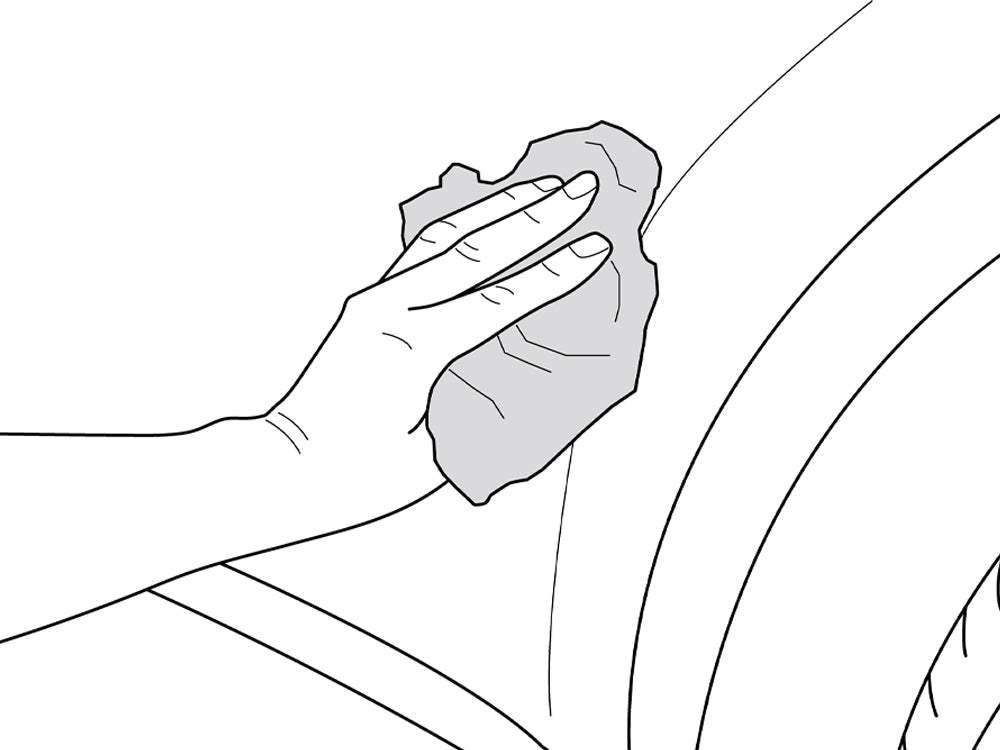
2. Thoroughly remove any dirt or dust from around the installation area.
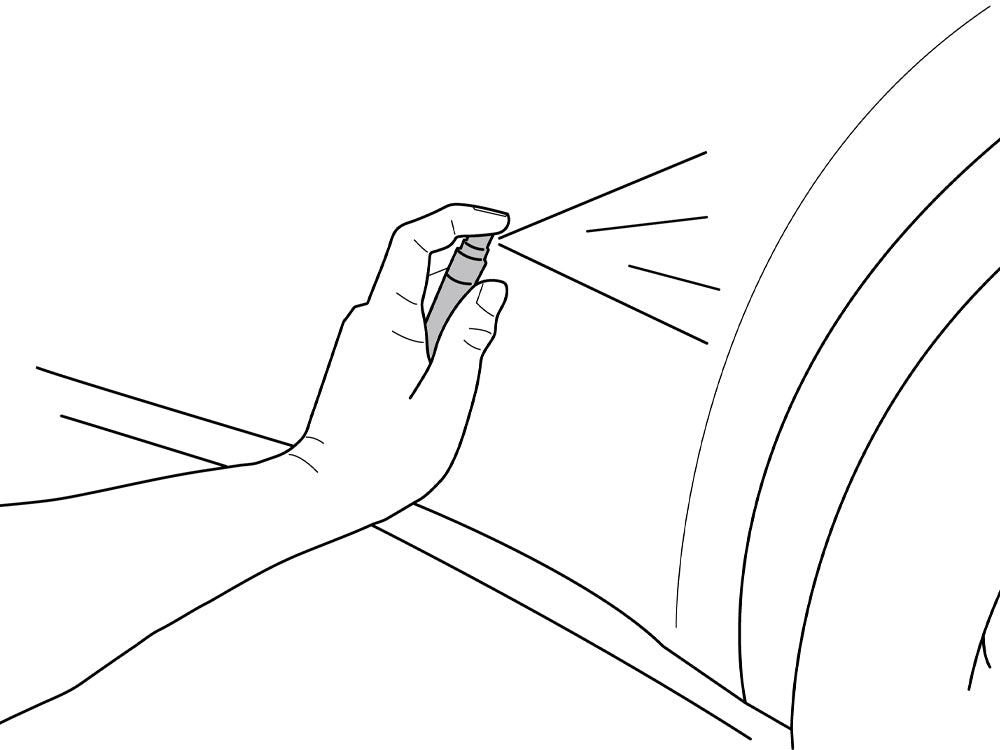
3. Apply the prepared spray solution over the entire installation area. Note: Be sure to apply it evenly, including the surrounding area.
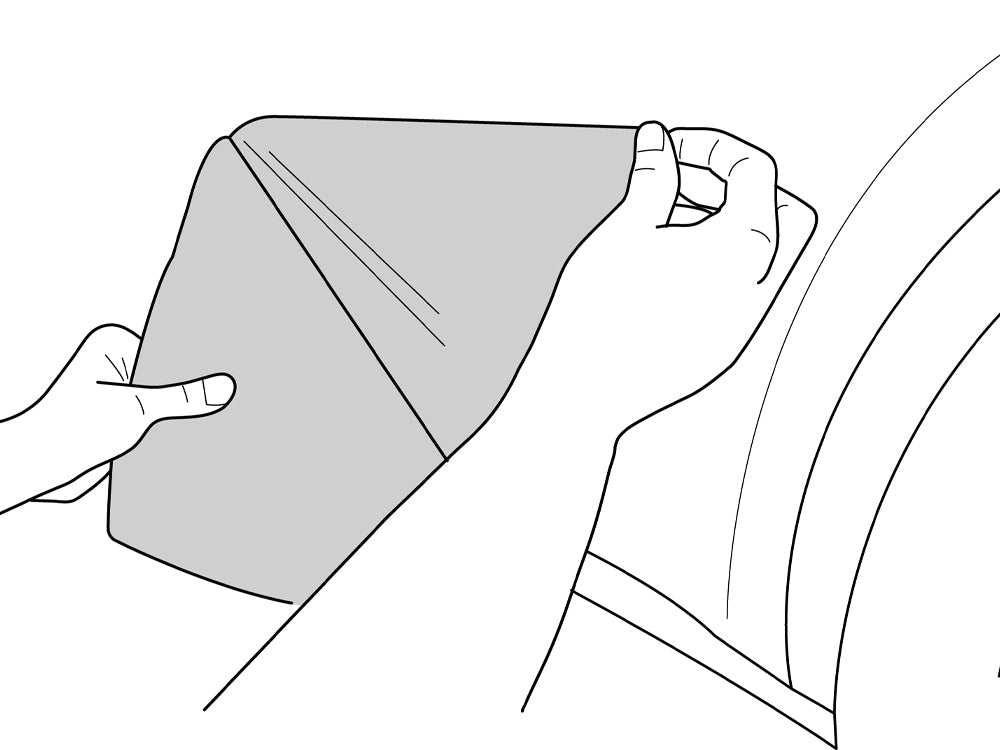
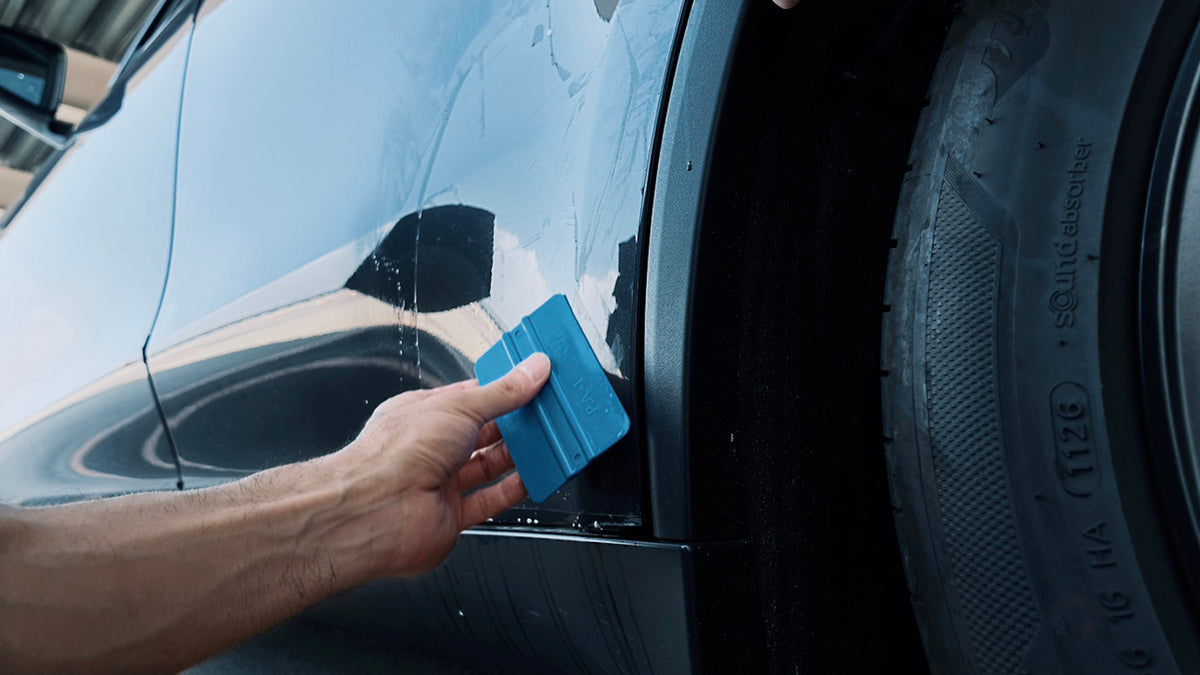
4. Check the backing sheet on the back of the protection film to confirm the installation position. Slowly peel back about half of the backing from one edge, and gently apply the film to the body. At this stage, it does not need to be precisely aligned.
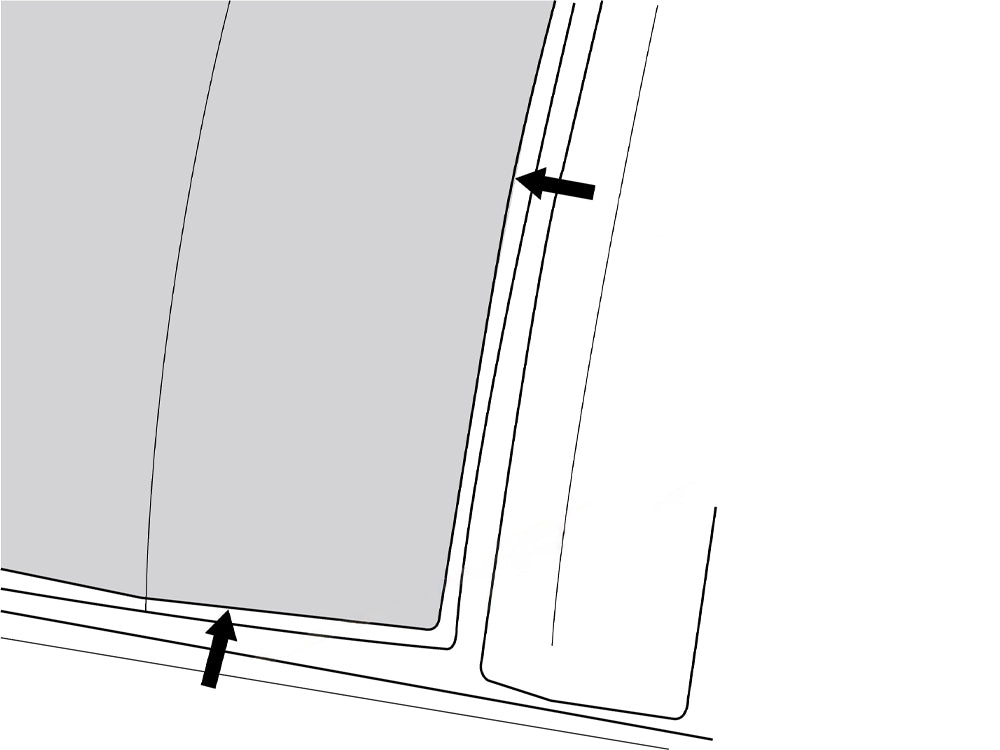
5. Thanks to the spray solution applied in Step 3, the film can still be repositioned on the body. Adjust it by hand. If part of the film won't move, peel back just that section and reapply the spray solution. Leave a gap of about 1 mm from the edge rather than aligning the film flush with it — flush alignment makes the edge more prone to lifting.
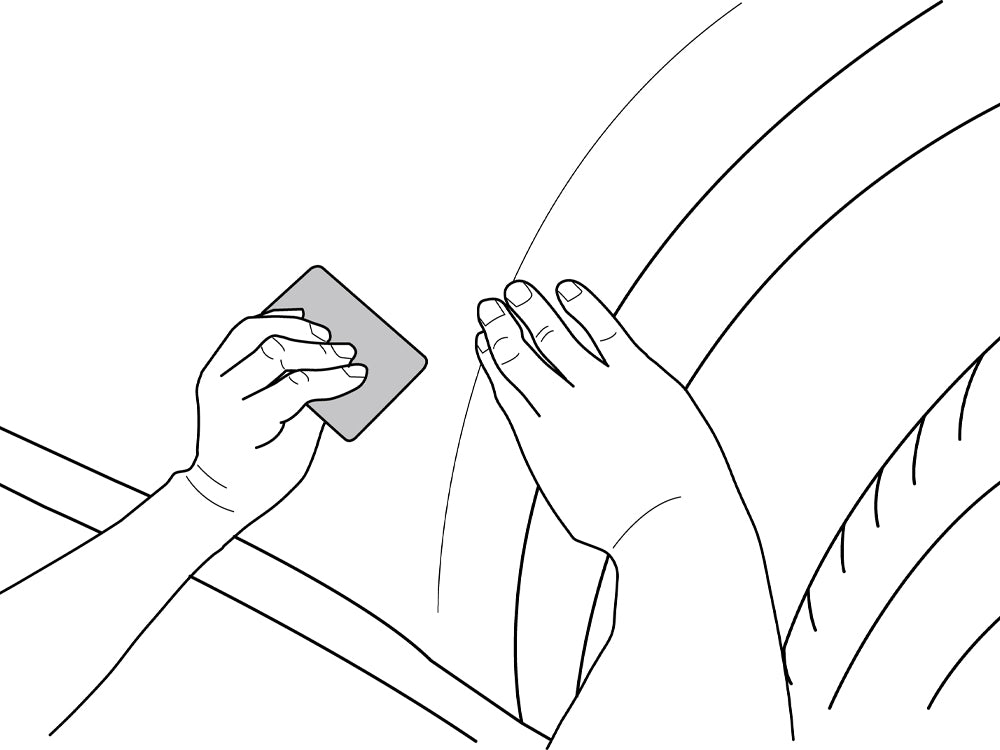
6. Using the included squeegee, carefully push the air bubbles and solution out toward the edges. Hold the film lightly in place with one hand while making small position adjustments as you work. Note: Pressing too hard with the squeegee may scratch the film.
7. Continue adjusting the position while checking that all air bubbles and solution have been pushed out.
8. Wipe away any remaining solution around the edges with a microfiber towel.
Note: If the position shifts and can no longer be adjusted, peel off the film, reapply the spray solution, and repeat Steps 5–7.
9. Repeat Steps 1–8 for the door on the opposite side.
Post-Installation Care
- Avoid washing the vehicle or exposing it to water for 24 hours after installation.
- Avoid applying coating products or wax to the area with the installed film.
- When washing the vehicle, do not point a pressure washer nozzle directly at the edges of the film — this may cause it to lift or peel.
- Use a pH-neutral car wash soap, and avoid scrubbing with stiff brushes or sponges.
Trademarks & Disclaimer
- “Tesla” and “Model Y” are trademarks or registered trademarks of Tesla, Inc. MODUFY and NEXEL International inc. are not affiliated with Tesla, Inc. in any way, and this product is not approved, endorsed, or sponsored by Tesla, Inc.
- This product is an aftermarket product designed to protect the vehicle's paint surface. We are not responsible for any damage to the vehicle or product resulting from installation that does not follow the procedures and precautions described in this manual.
- This English translation is provided for reference purposes only. In the event of any
discrepancy between the Japanese and English versions, the Japanese version shall prevail. - The contents of this manual are subject to change without notice.