Installation - MagSafe Charger Pro
Caution
・Adhesive residue may remain on the mounting surface after it has been used in a
high-temperature environment. In such a case, please wipe it off with a soft cloth soaked in alcohol or another type of wiper.
・The arm and base of the charger are fixed by a strong magnet and can be rotated and
attached/detached. There is the risk of dropping if the magnet peels off due to excess stress.
・Don’t attach the charger to a place that is modified by painting or wrapping because
this product uses a strong adhesive. Also, please note that it cannot be attached to curved surfaces or rough surfaces.
・You must comply with the Traffic Laws when using this product.
Chargerplacement and connecting charger cables
1. To remove dirt, oil, and water
residue, clean and wipe around the installation position with an alcohol wipe
or similar wiper.
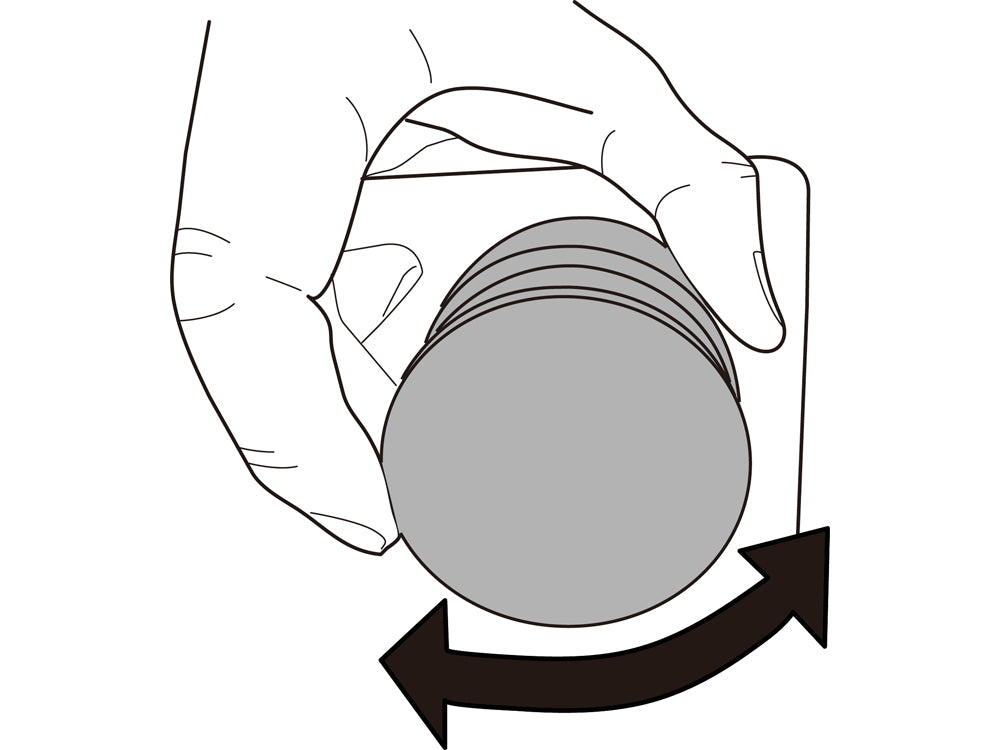
2. Turn the adhesion part to the left 2 or 3 times to loosen it.
3. Fix the position of the smartphone while extending the charger arm. It is not adhered yet at this moment. (Note: This product cannot fix the position on surfaces that are curved or have high roughness.)
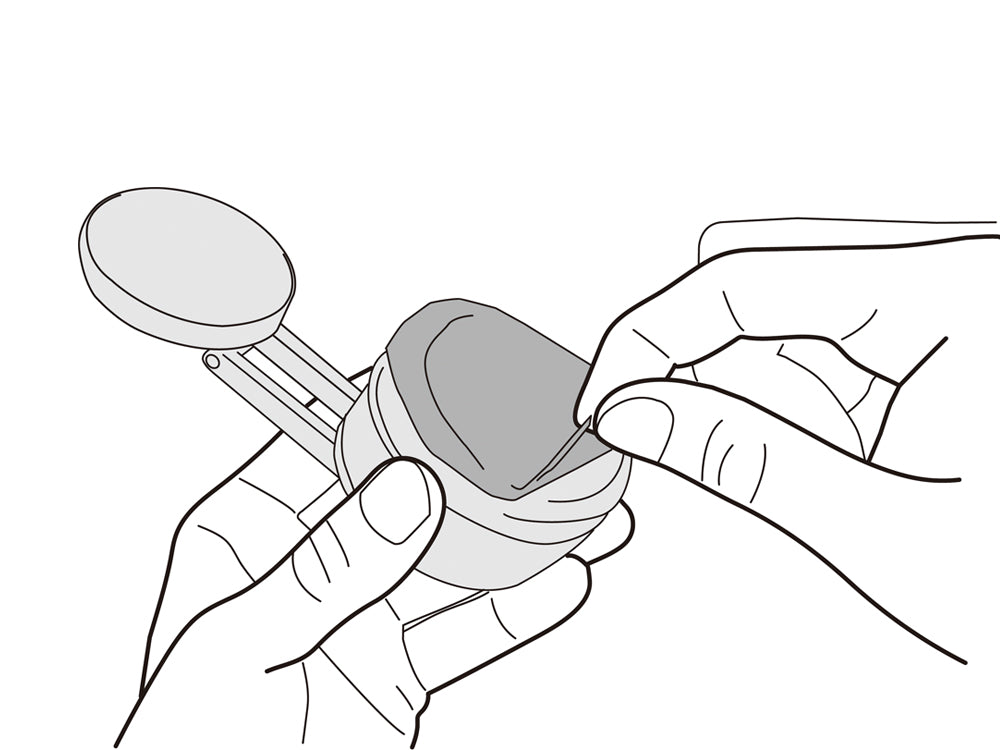
4. After fixing the position to install, remove the separator film slowly from the adhesion part. (It is recommended to keep the eparator film when you may move this product to another adhesion position or install it to another car model).
5. After adhering the product, retract the charger arms and turn it to the right until it is fixed tightly, then the adhesion area can be fixed rigidly. Once you have confirmed that it is securely attached, extend the charger arm and adjust the position.
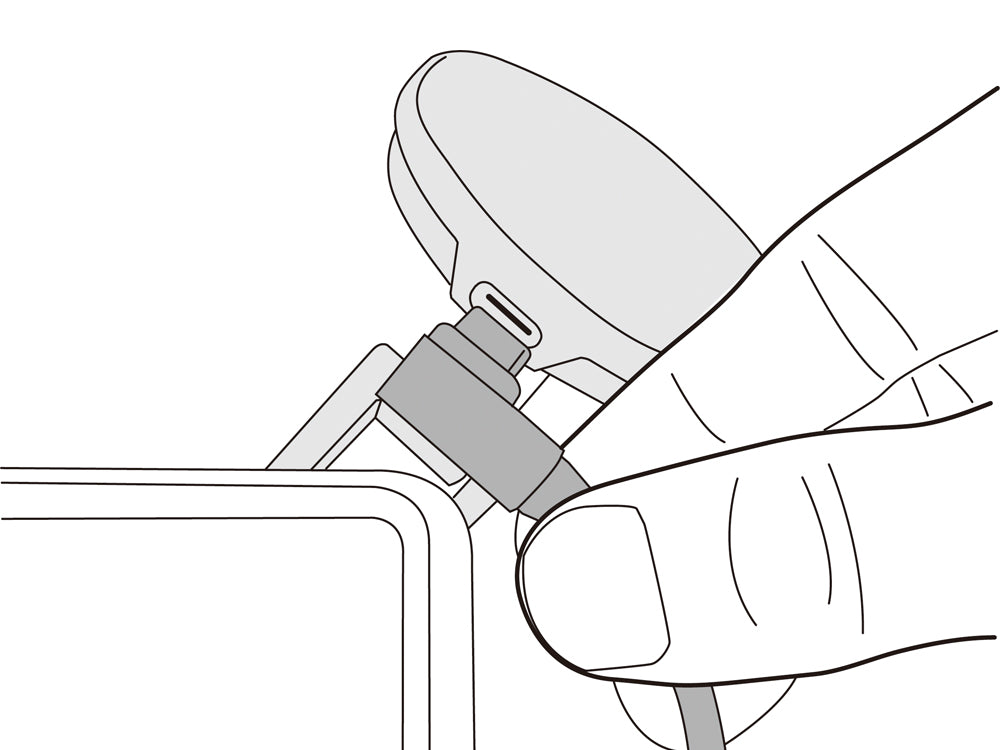
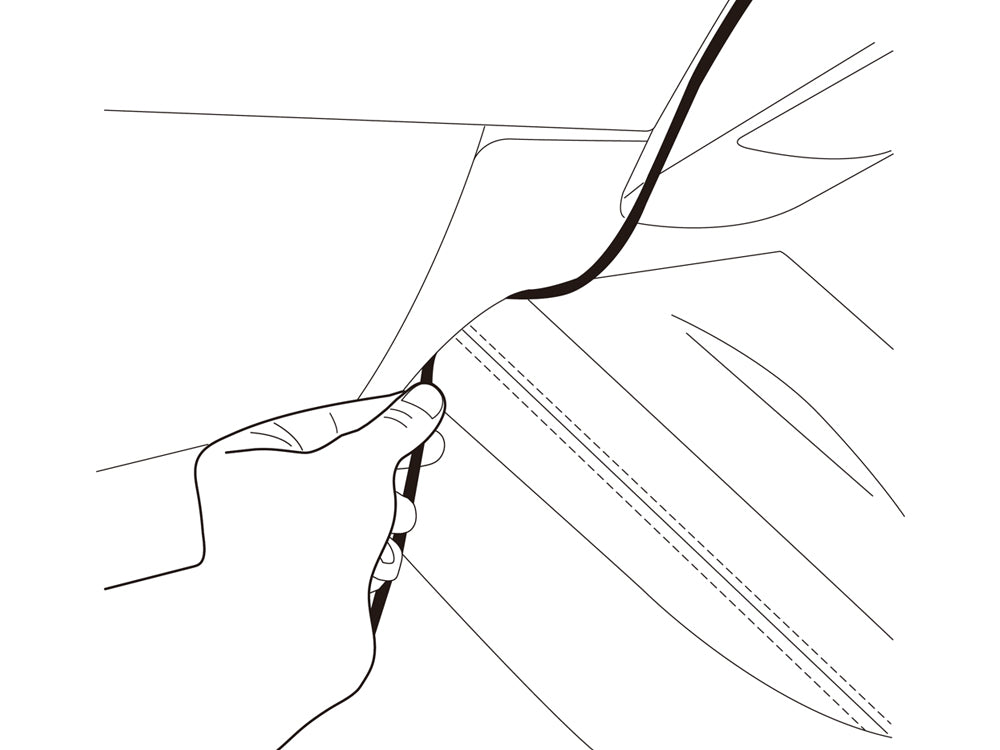
6. Connect the USB cable (type-C) to the charger while the arm is extended.
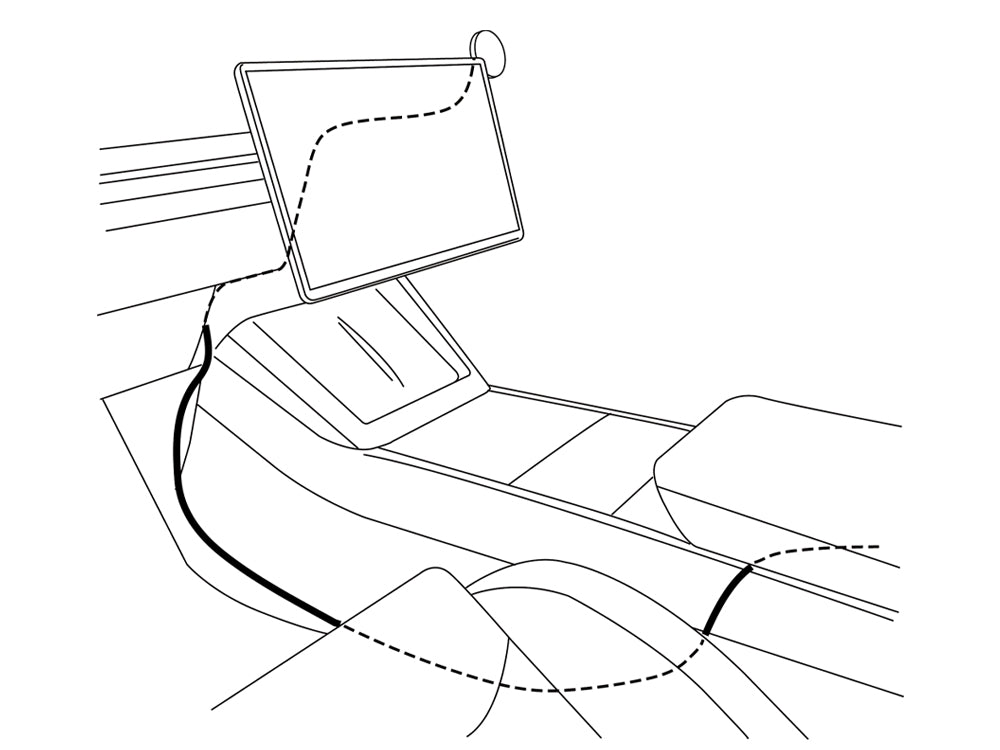
7. The cable can be hidden from the driver’s seat if it is pulled out from the back side of he screen and passed under the console on the passenger seat side.
8. The cable can be hidden from the driver’s seat if it is put into the narrow space under the charger base.

9. Connect the other side of the USB cable (Type-C) to the USB port on the center console, or the USB port under the air conditioning flow outlet of the rear seat.
10. Battery charging starts when an iPhone is set in the charging area that is compatible with Apple MagSafe.
[Additional Information]
This device is only compatible with iPhones that support MagSafe wireless charging or iPhones that support wireless charging and use a MagSafe compatible case. Phones can be placed in either portrait or landscape orientation.
[Caution]
・An iPhone attached for charging may cover a portion of the vehicle’s touchscreen.
Vibrations from the vehicle could cause the iPhone being charged to fall.
Do not get distracted by notifications from the iPhone being charged. Doing so could result in an accident.
How to detach the charger
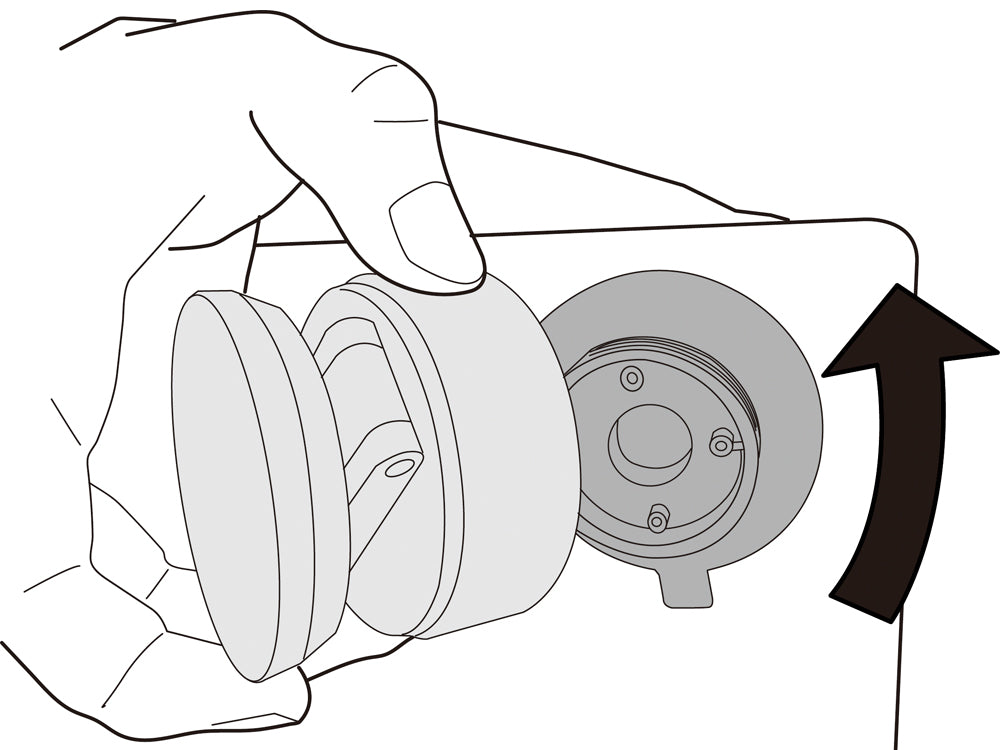
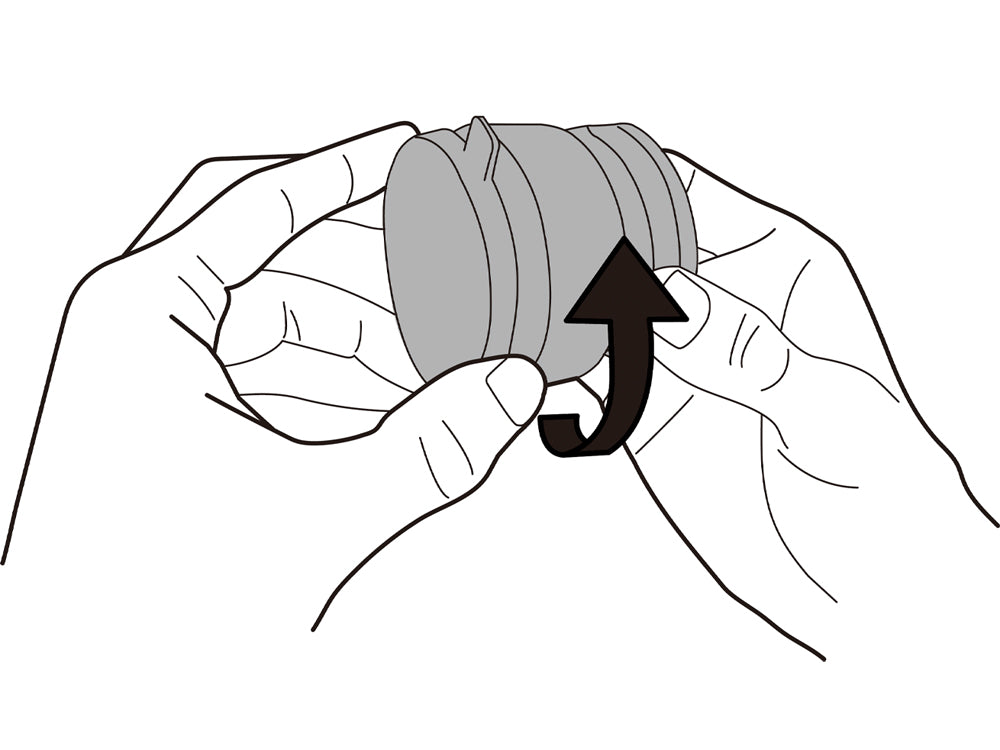
1. Hold the charger and turn it to the left to detach the charger and adhesion surface.
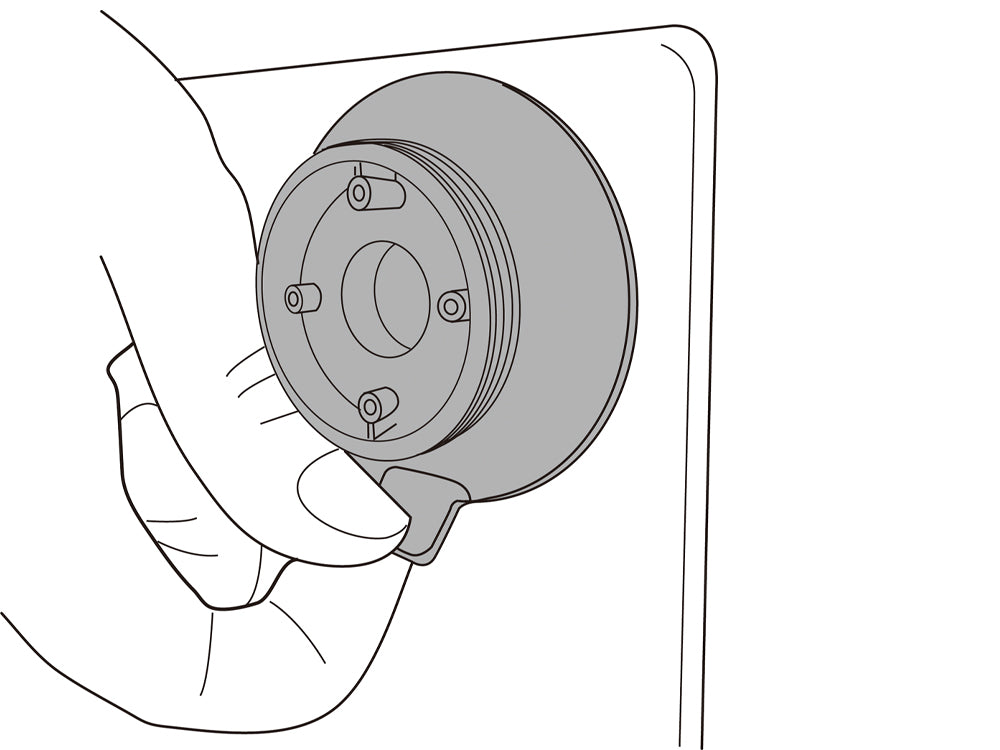
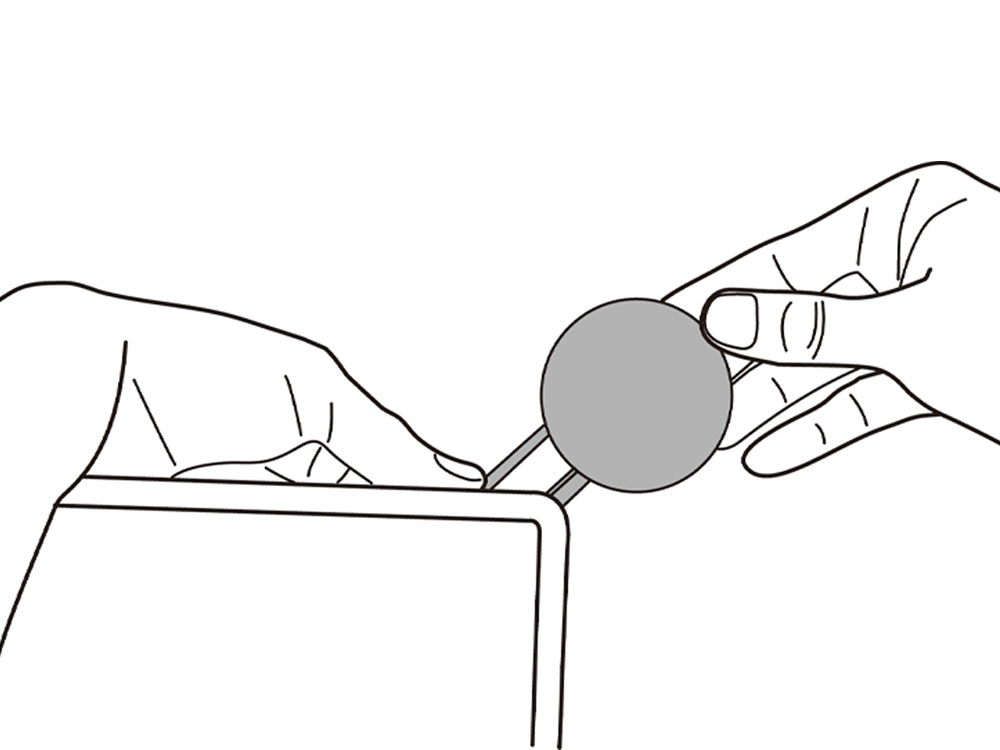
2. Hold the black handle on the adhesion part and remove it. Because a strong adhesive is used, please hold it tightly and remove it slowly.
Maintenance
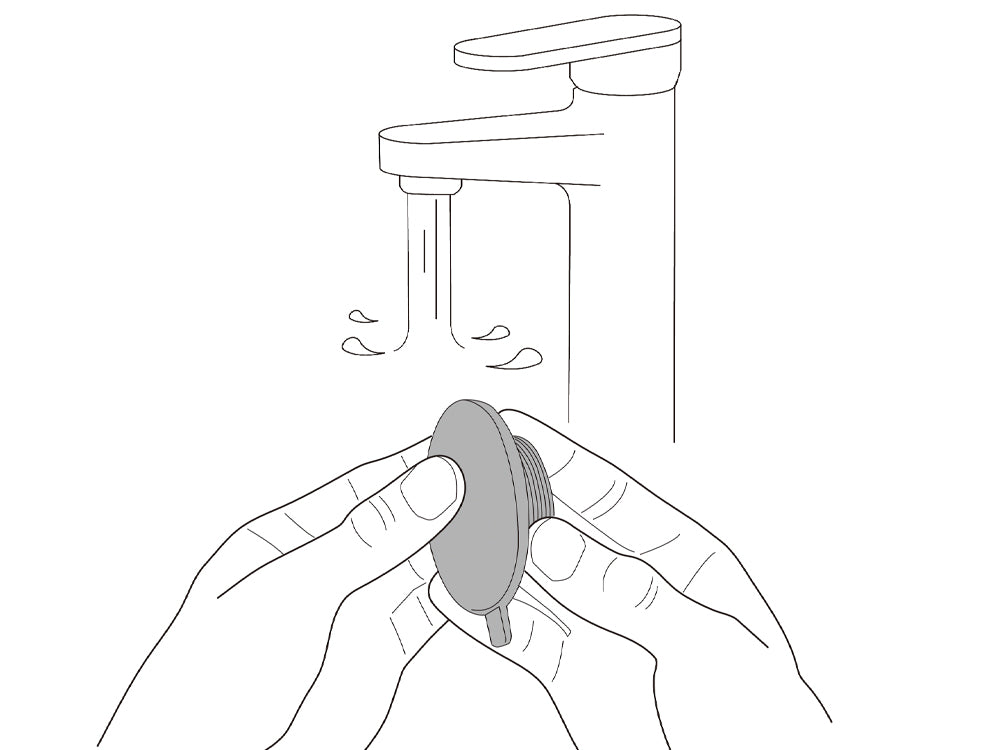
If the adhesion surface becomes dirty, the adhesion force will degrade, then increase the risk of the product or smartphone falling and being damaged. In such a case, turn the adhesion surface to the left and disassemble it, wash with water, then dry it naturally in a dark environment.

The screws on the charger arms may loosen after long use. In such a case, tighten them with the hex wrench included in the package. There are 3 hinges that need to be checked.
Help
Please check again after removing the smartphone case if you are using one. Change the USB cable to a new one. Or reboot your phone and check again.
Please turn the screw at the hinge to the right and tighten it again.
Please follow section 6. Maintenance. If it is not solved, please contact customer service.
The charger including arms and base can be attached/detached by a strong magnet. When they are separated, please attach them gently with the arms set in the correct position.
If the arm is positioned horizontally while the product is mounted on the right side of the screen, the weight of the smartphone may gradually loosen the rotating joint of the main unit, causing the arm to drop downward. If this occurs, please tighten the main unit again. When installing the product on the right side, it is recommended to position the smartphone mount diagonally above or directly above the screen.