Installation - Door Defender
Door Defender Parts Order
If you have previously ordered Door Defender and are missing individual parts, you can now order the parts individually.
※Limited to customers living in Japan


1. Caution
Do not install the product in dark environments or during bad weather, as improperadhesion may cause the protector to detach. Before installation, wash the vehicle or otherwise remove dirt and contaminants from the body surface.
Some installation parts differ between Model 3 and Model Y. Parts labeled '3' are designed for Model 3, while parts labeled 'Y' are designed for Model Y.
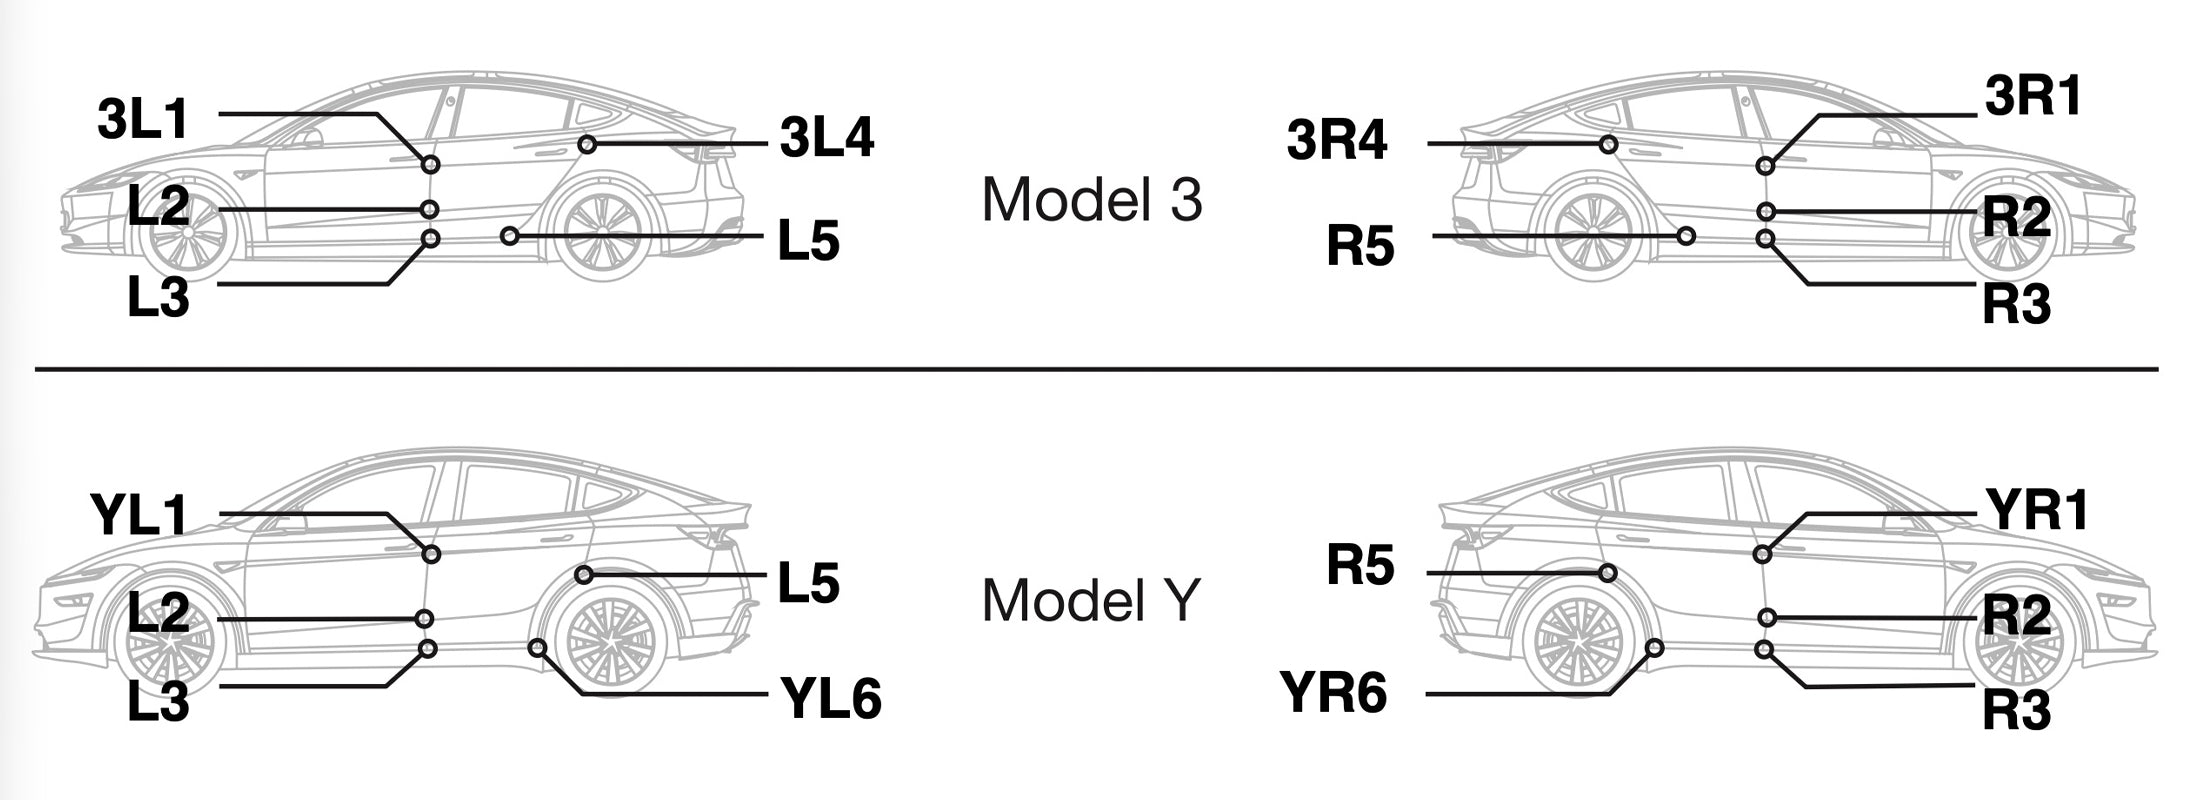
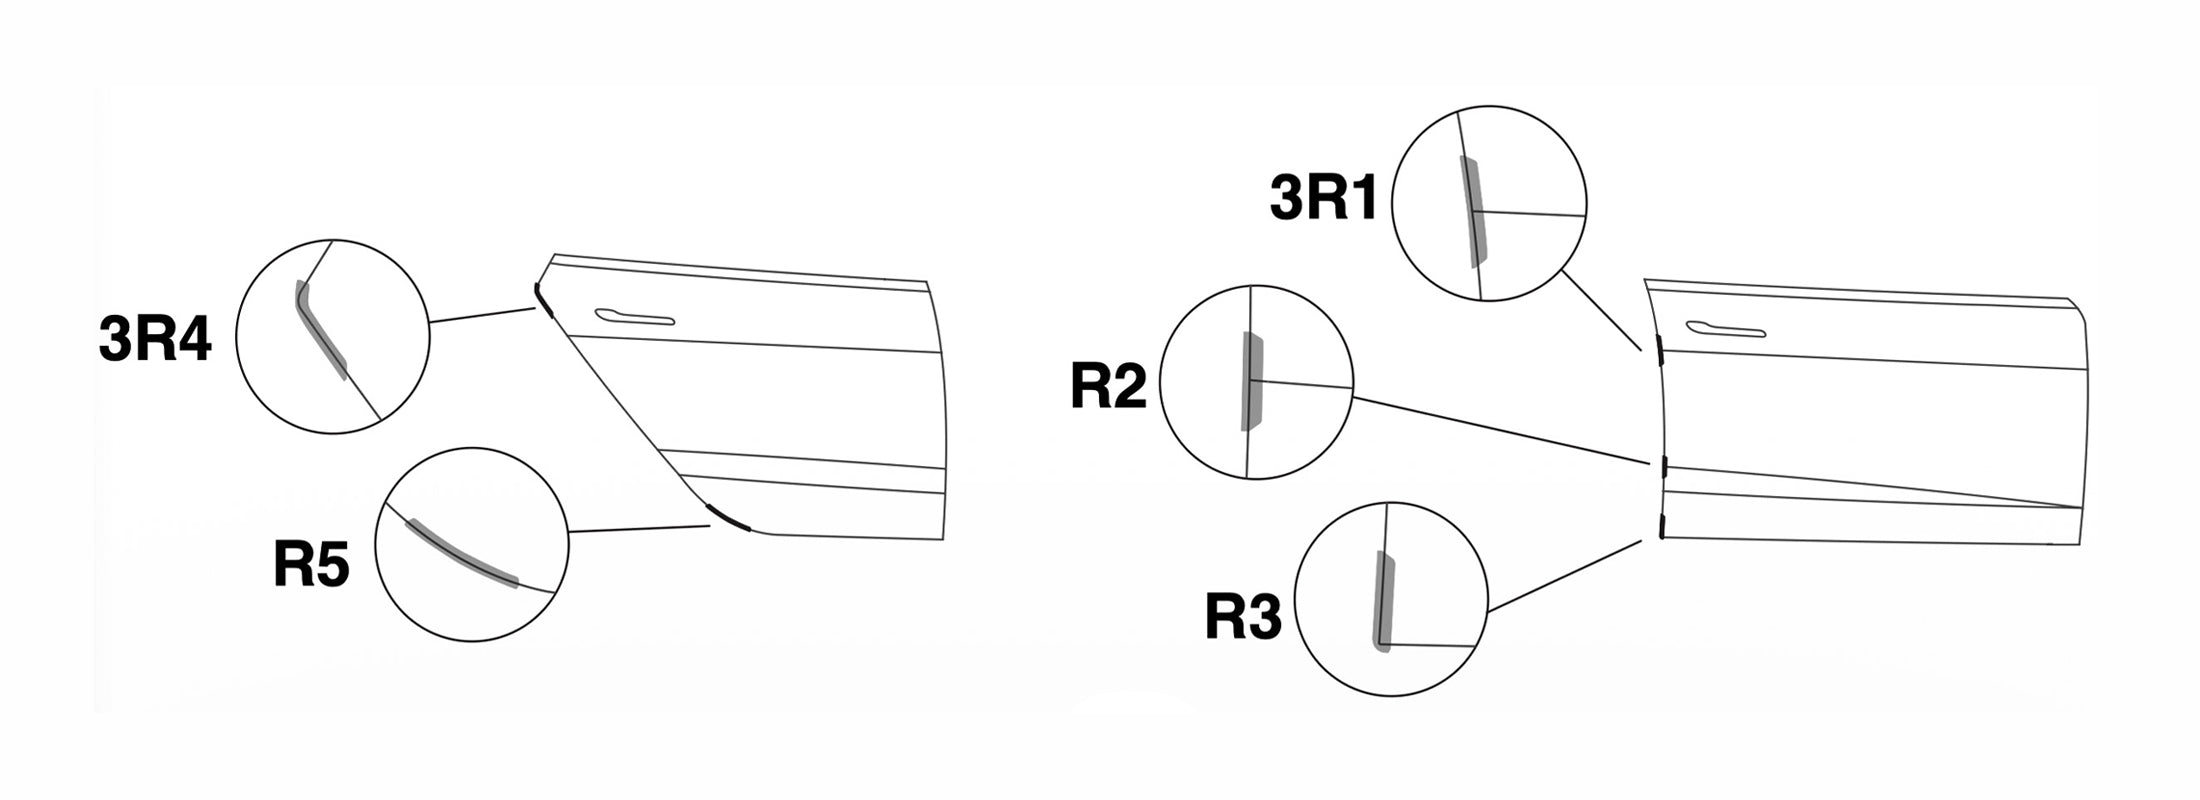
Installation Positions for Model 3 (Right Door Example)
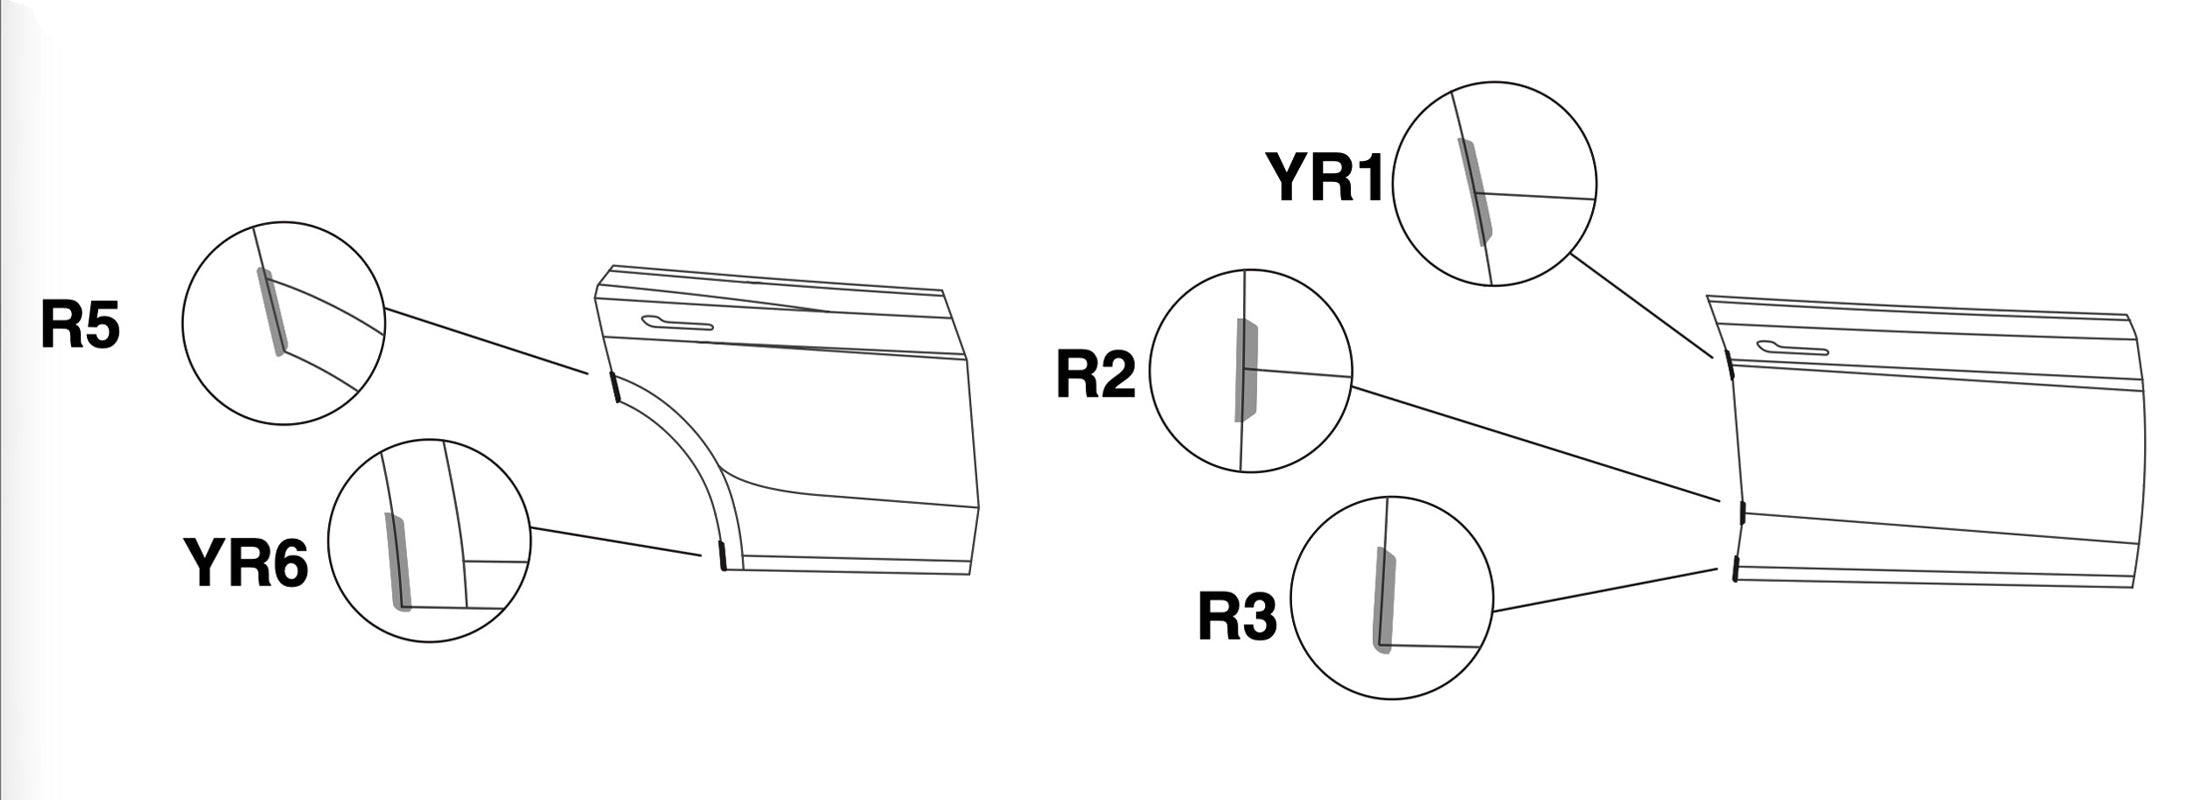
Installation Positions for Model Y (Right Door Example)
2. Install
2.1. Cleaning the Installation Area
Use the included 'Wet' alcohol wipe to thoroughly clean and degrease both surfaces along the door edge. Two sets are included; use one set to clean the front and rear doors on one side of the vehicle.
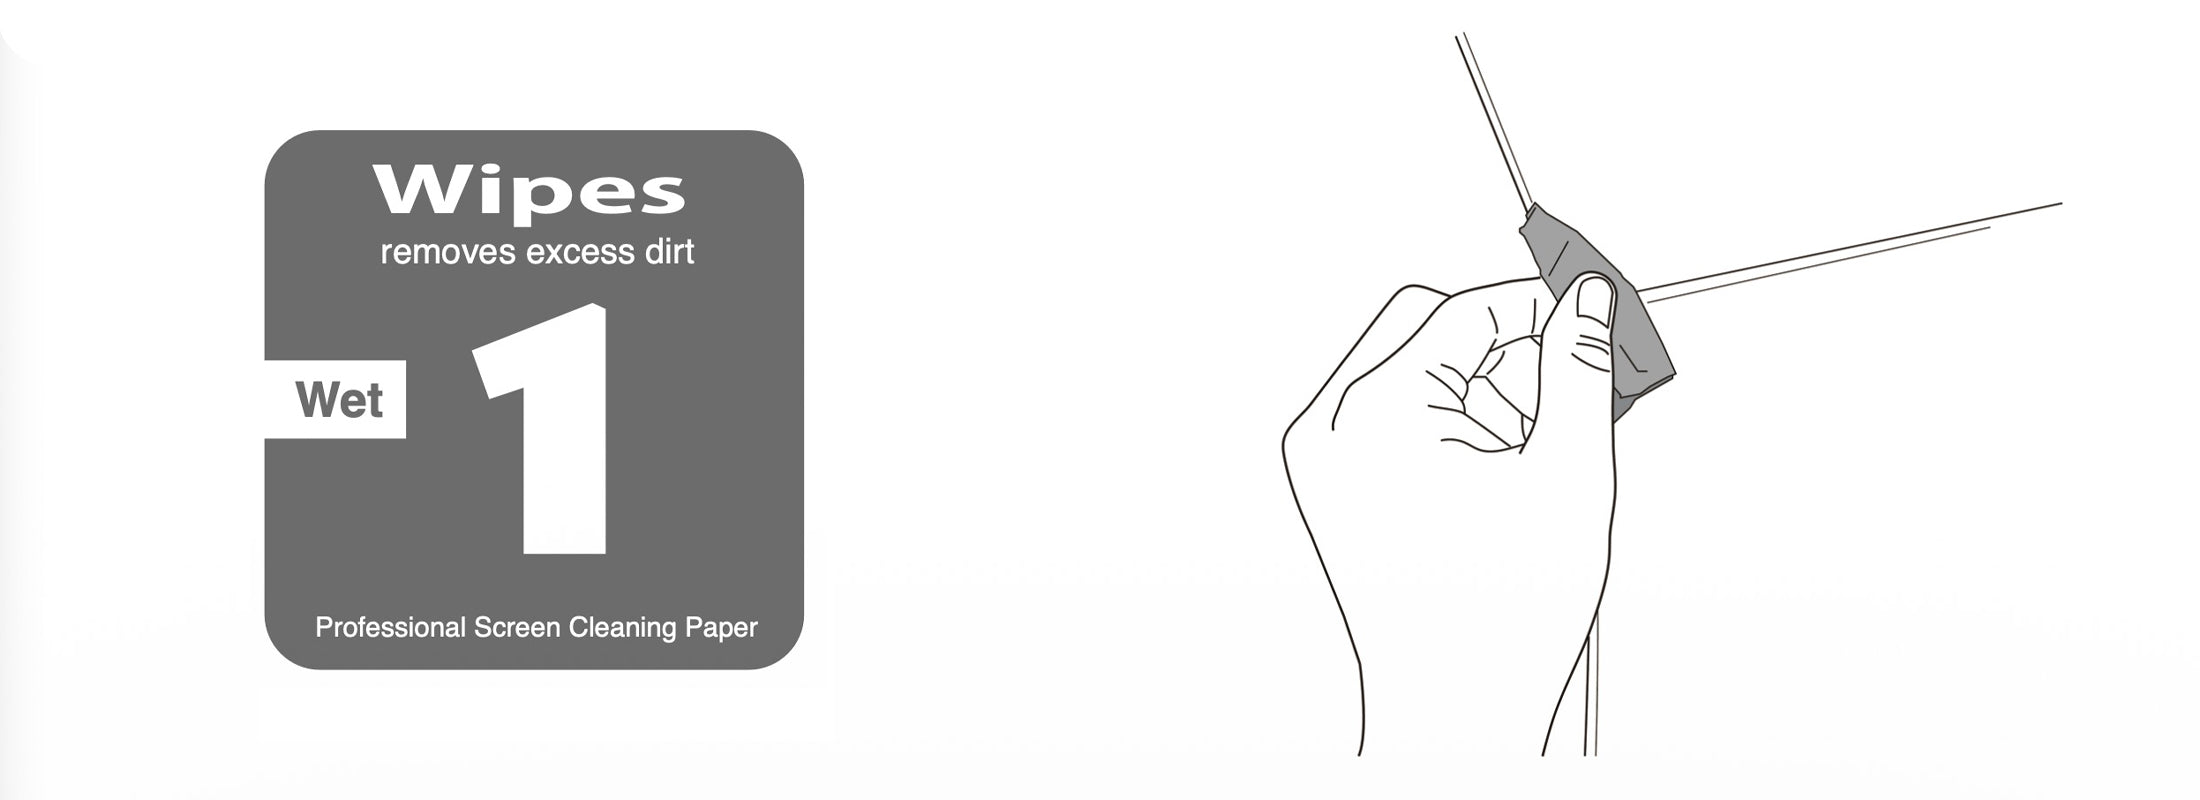
After degreasing, use the 'Dry' wipe to remove any remaining moisture from the cleaned areas.
*The following instructions describe installation for each part.
The procedure shown is for the right-side door; install the left-side door in the same way.
2.2 Installation of 3R1 (3L1) or YR1 (YL1)
This part installs along the lower edge beneath the front door handle.
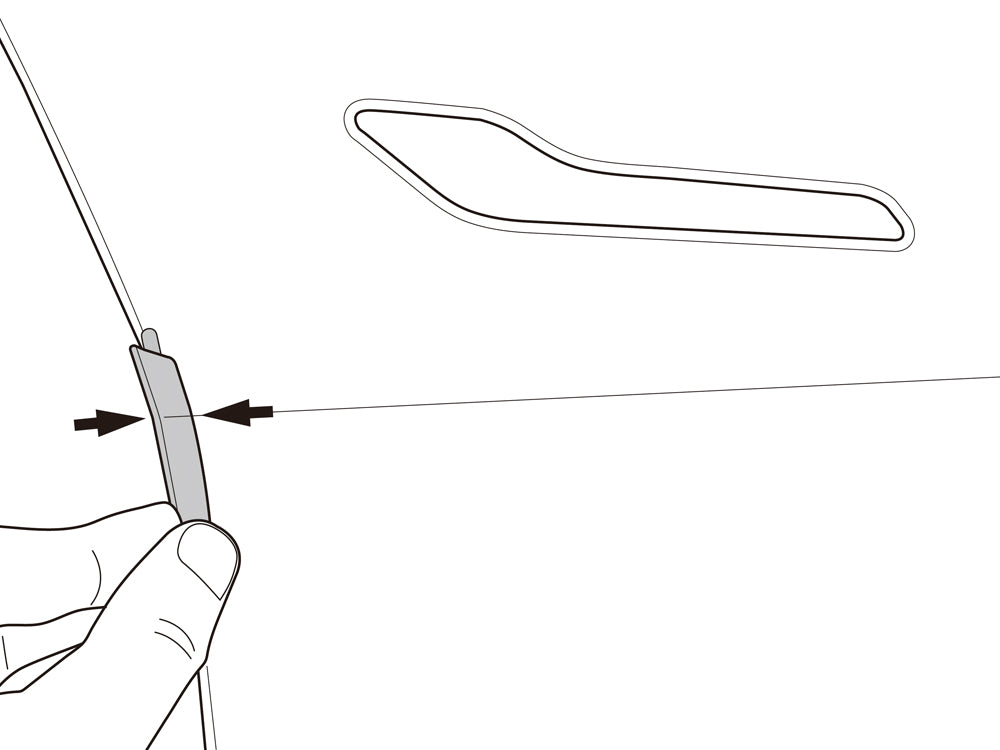
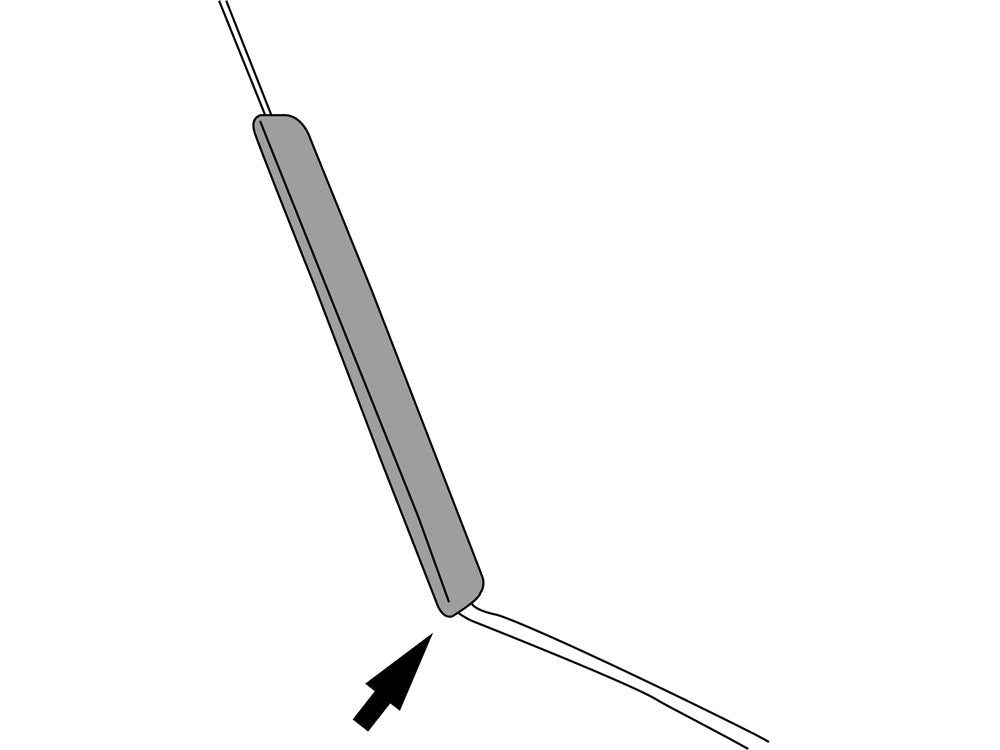
1. Align the raised line on the silicone part with the body panel line of the vehicle before positioning it. If you are unsure of the installation position, refer to the installation position shown in Section 1 “Caution”.
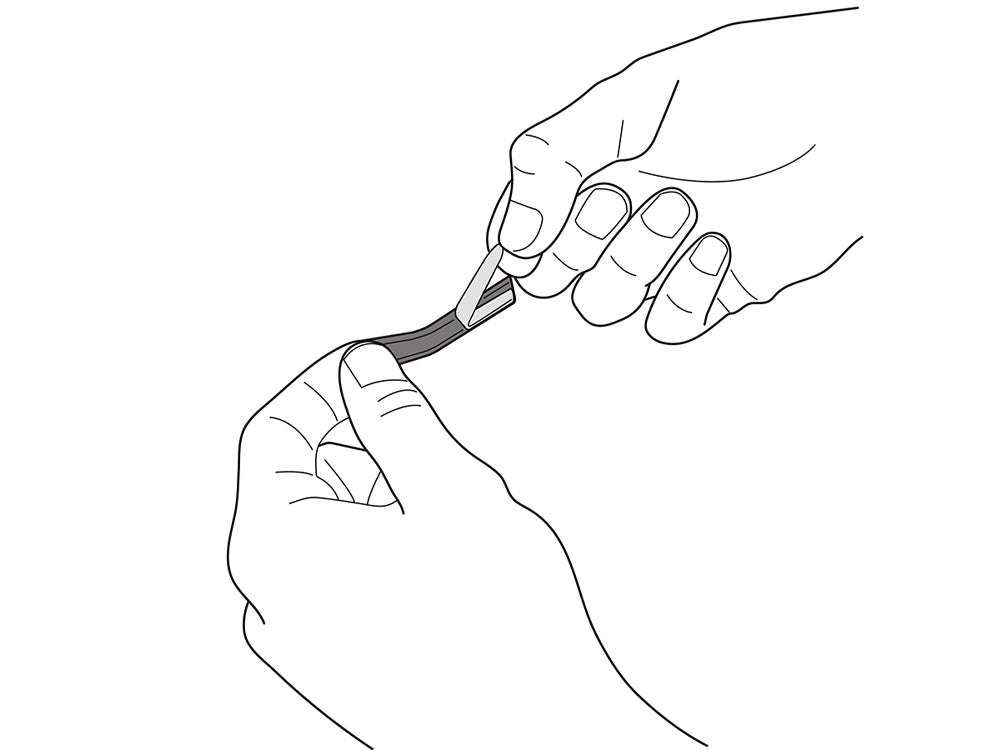
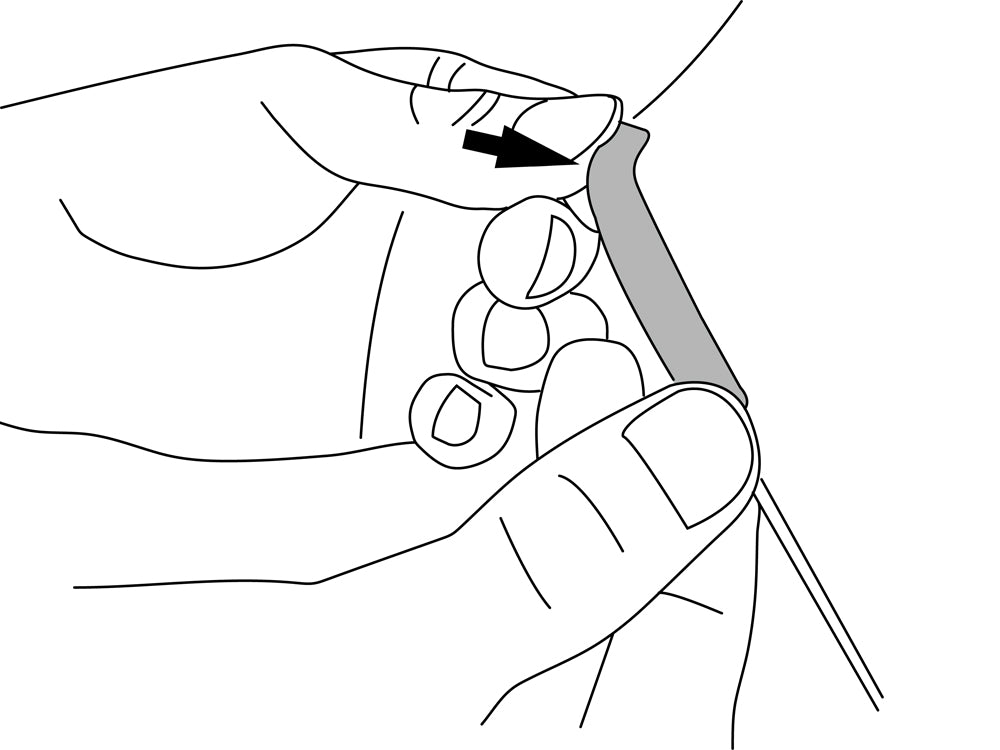
2. After confirming the installation position, slowly peel off the protective film from the double-sided adhesive tape on the back of the product.
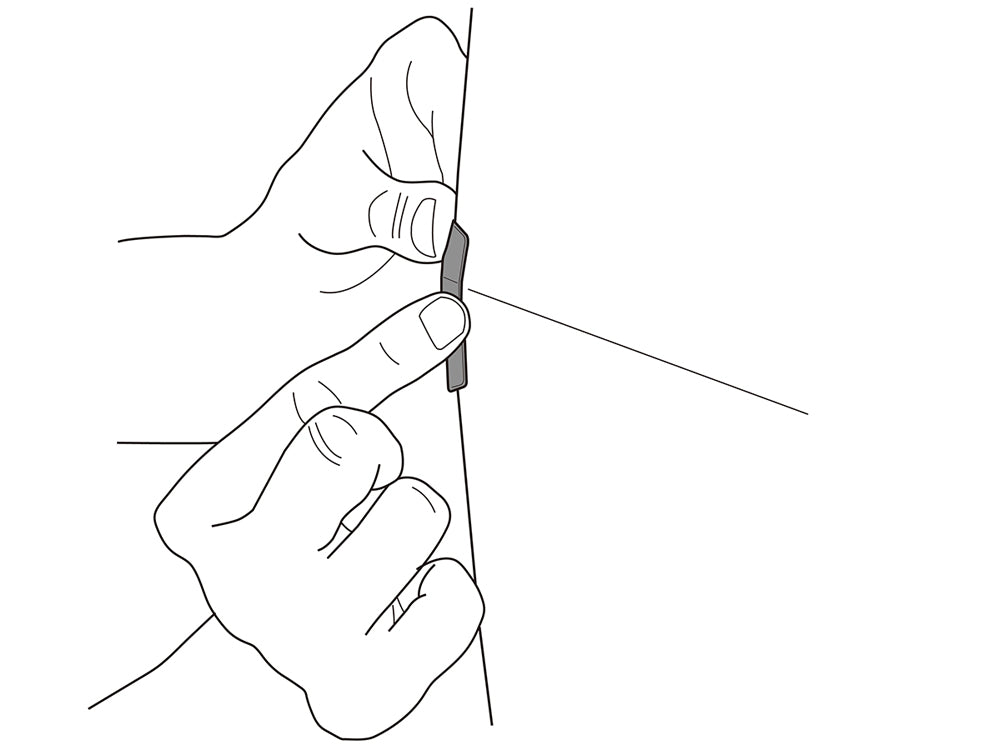
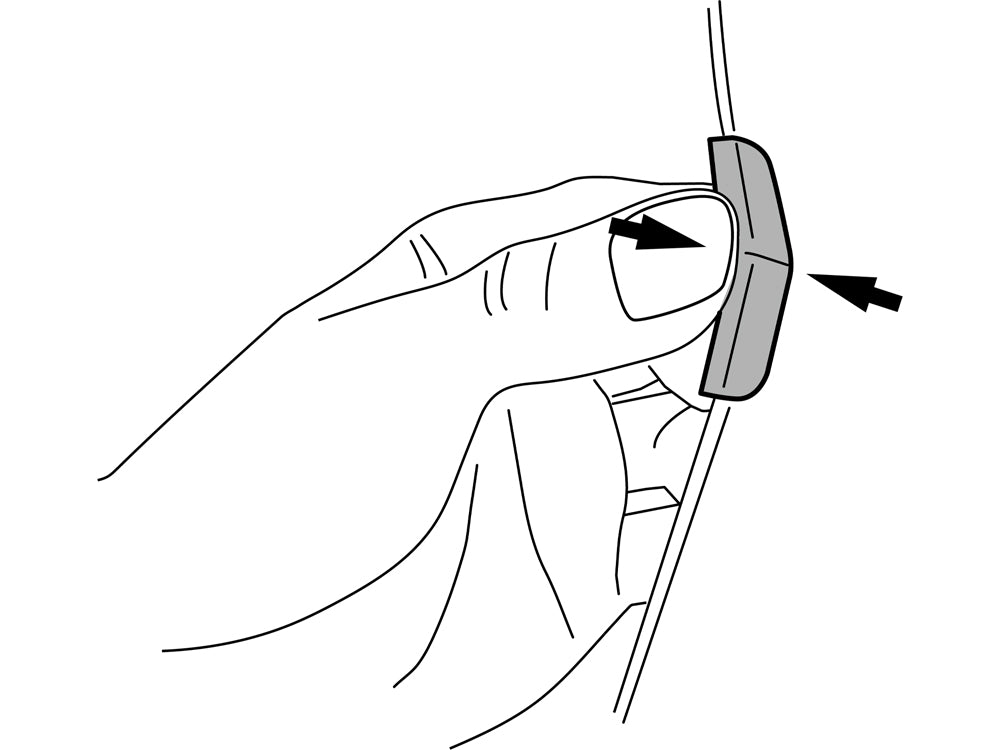
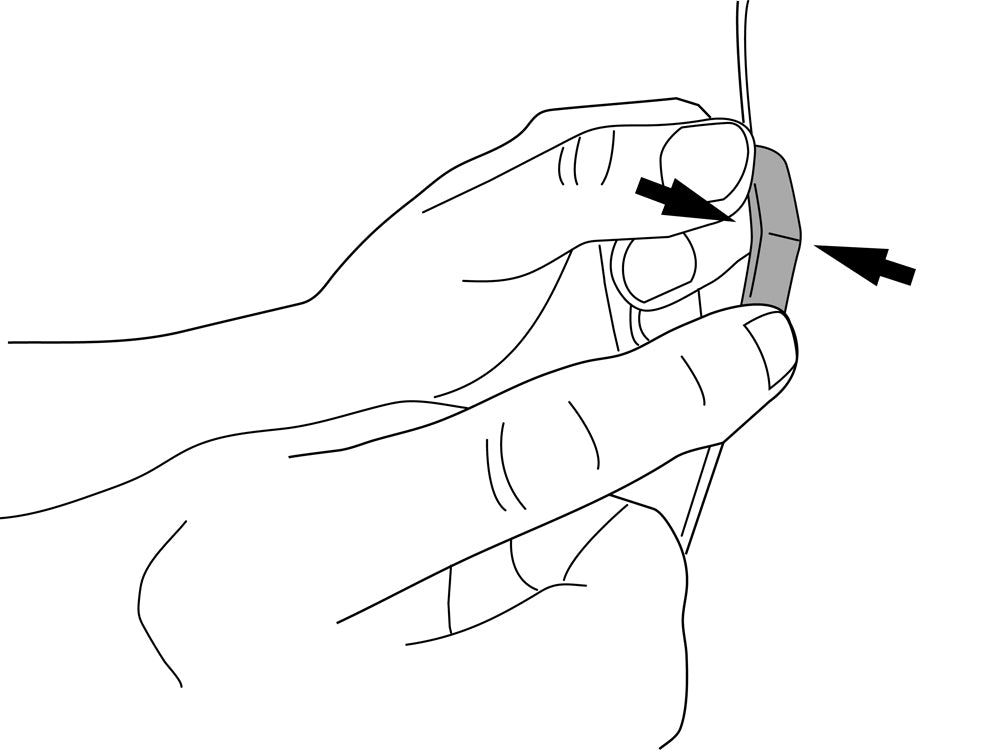
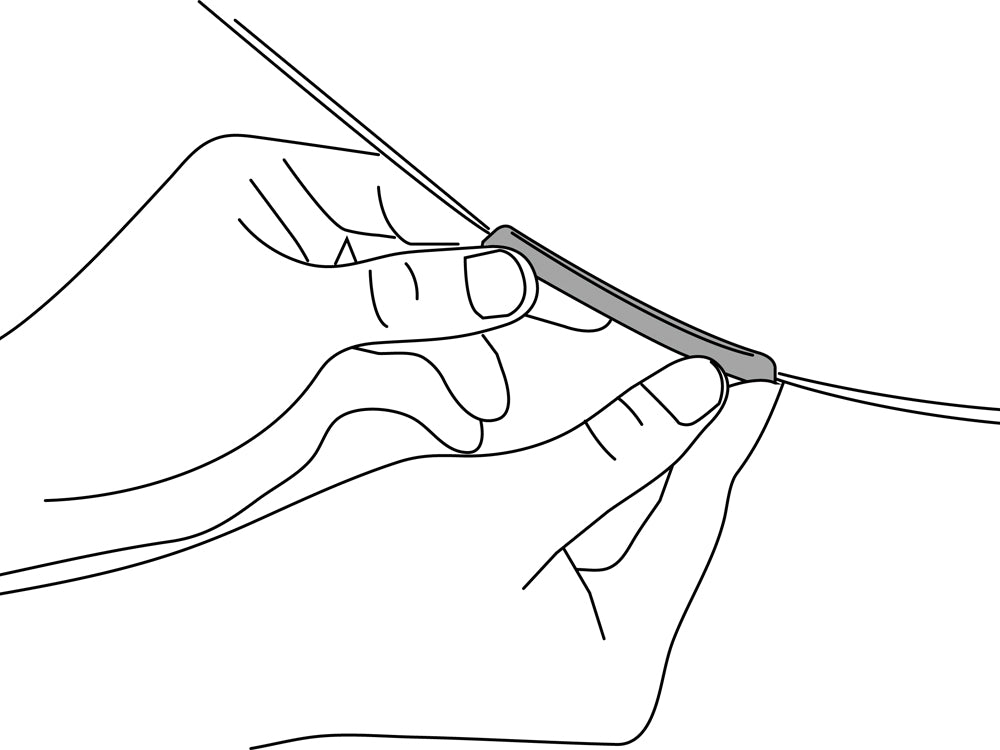
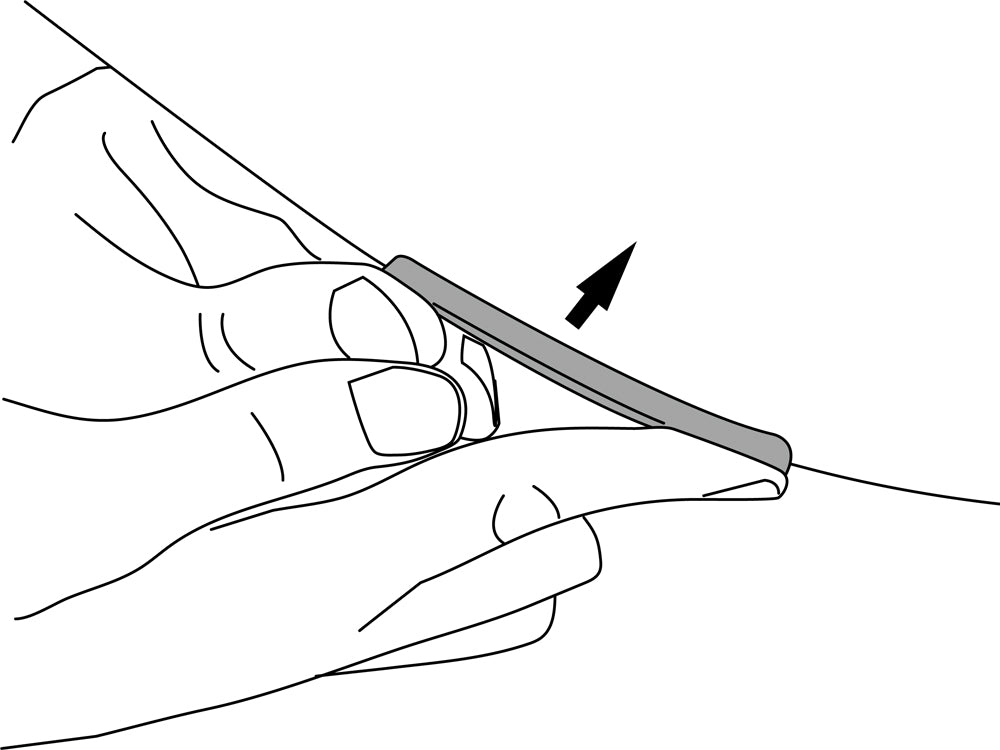
3. Insert the product onto the edge of the door in the direction indicated by thearrow so that it fits the contour of the door. Carefully install it to avoid misalignment.Once properly positioned, firmly press the adhesive area with your fingers for about 10 seconds.
2.3 Installation of R2 (L2)
This part installs on the edge of the raised center section of the front door.
1. Align the raised line on the silicone part with the body panel line of the vehicle before positioning it. If you are unsure of the installation position, refer to the installation position shown in Section 1 “Caution”.
2. After confirming the installation position, slowly peel off the protective film from the double-sided adhesive tape on the back of the product.
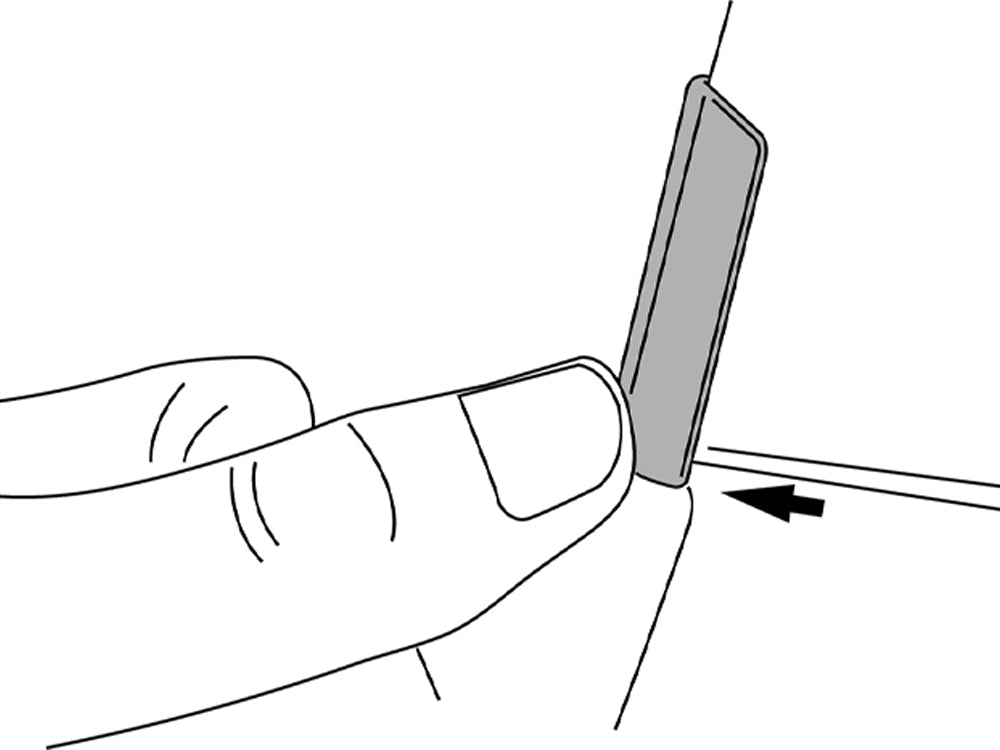
3. Insert the product onto the edge of the door in the direction indicated by the arrow so that it fits the contour of the door.Carefully install it to avoid misalignment. Once properly positioned, firmly press the adhesive area with your fingers for about 10 seconds.
2.4 Installation of R3 (L3)
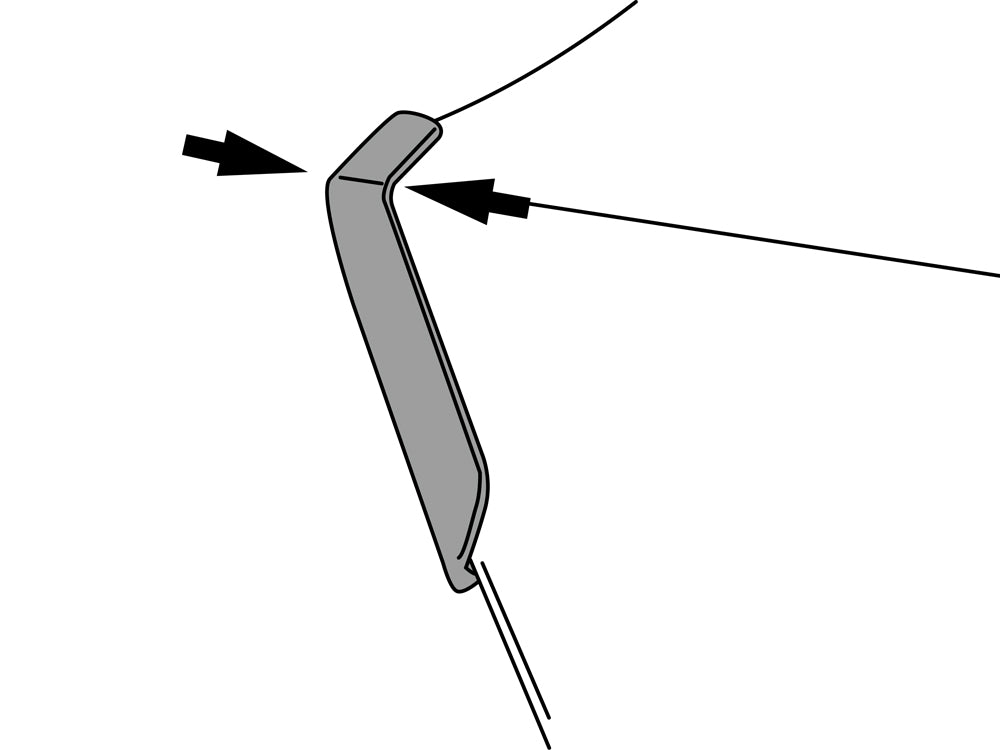
This part installs on the bottom corner of the front door.
1. Position the part so that the base of the L-shaped silicone section aligns with the corner of the door. If you are unsure of the installation position, refer to the installation position shown in Section 1 “Caution”.
2. After confirming the installation position, slowly peel off the protective film from the double-sided adhesive tape on the back of the product.
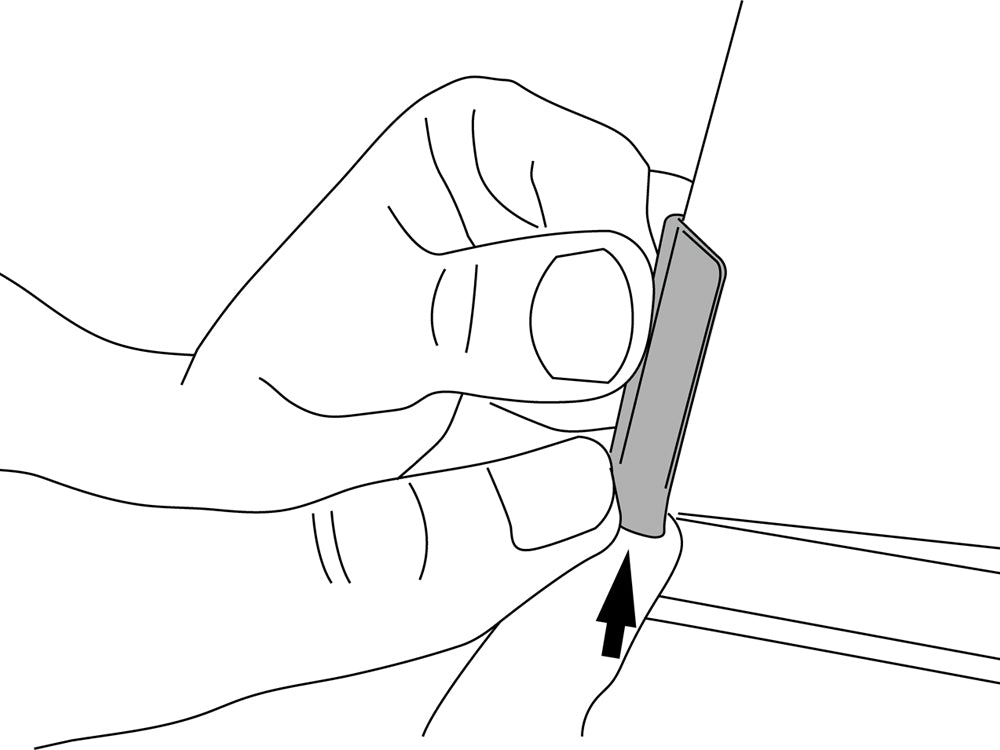
3. Insert the product onto the edge of the door in the direction indicated by the arrow so that it fits the contour of the door.Carefully install it to avoid misalignment.Once properly positioned, firmly press the adhesive area with your fingers for about 10 seconds.
2.5 Installation of 3R4 (3L4)
This part installs along the lower edge beneath the rear door handle of Model 3.Skip this step if you are installing on Model Y.
1. Align the raised line on the silicone part with the body panel line of the vehicle before positioning it. If you are unsure of the installation position, refer to the installation position shown in Section 1 “Caution”.
2. After confirming the installation position, slowly peel off the protective film from the double-sided adhesive tape on the back of the product.
3. Insert the product onto the edge of the door in the direction indicated by the arrow so that it fits the contour of the door.Carefully install it to avoid misalignment.Once properly positioned, firmly press the adhesive area with your fingers for about 10 seconds.
2.6 Installation of R5 (L5) for Model 3
This is a shared part; however, the installation position differs between Model 3and Model Y.
1. Align the silicone part with the diagonal line on the lower edge of the rear door.If you are unsure of the installation position, refer to the installation position shown in Section 1 “Caution”.
2. After confirming the installation position, slowly peel off the protective film from the double-sided adhesive tape on the back of the product.
3. Insert the product onto the edge of the door in the direction indicated by the arrow so that it fits the contour of the door.Carefully install it to avoid misalignment.Once properly positioned, firmly press the adhesive area with your fingers for about 10 seconds.
2.7 Installation of R5 (L5) for Model Y
This is a shared part; however, the installation position differs between Model 3and Model Y.
1. Position the silicone part using the corner of the rear door as the reference point.If you are unsure of the installation position, refer to the installation position shown in Section 1 “Caution”.
2. After confirming the installation position, slowly peel off the protective film from the double-sided adhesive tape on the back of the product.

3. Insert the product onto the edge of the door in the direction indicated by the arrow so that it fits the contour of the door.Carefully install it to avoid misalignment.Once properly positioned, firmly press the adhesive area with your fingers for about 10 seconds.
Door Defender Parts Order
If you have previously ordered Door Defender and are missing individual parts, you can now order the parts individually.
※Limited to customers living in Japan